What are Solids in Maths?
Dimensions
- Dimension is a measurable length along a direction.
- Dimensions are length, breadth (or width) or height (or depth).
- A point is dimensionless.
- Based on the number of dimensions a figure has, there are one-dimensional, two-dimensional and three-dimensional figures.
You Already Know These Shapes!!
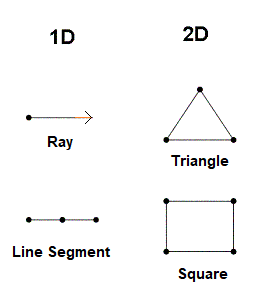
1D and 2D figures
- One-dimensional figures do not enclose any area and have only one direction.
Example: A ray or a line segment. - Two-dimensional figures have an area associated with them.
They have length and breadth or width.
They are usually plane figures, like squares, rectangles and circles.
Solid Shapes
- Solid shapes have length, breadth or width and depth or height.
- They are called 3D or three-dimensional shapes.
- Example: Cuboids, Cylinders, Spheres and Pyramids.

Visualising solid shapes
- Solid shapes can be visualised in different ways.
- Solid shapes can be formed by placing some solid shapes side by side to form a new solid shape.
- Example: (i) A cylinder is formed by stacking up circles vertically.
(ii) Cubes can be formed by placing cubes side by side.

Visualising solid objects by viewing the smallest unit
- A solid can be visualised by breaking it down to the smallest unit.
- For example, a cube of dimensions (3cm x 3cm x 3cm) can be made up of 27 small cubes of dimensions (1cm x 1cm x 1cm).

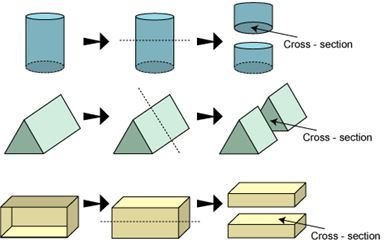
Viewing sections of a solid by slicing or cutting
- If you cut or slice a solid we get to view the cross-section.
Example: If a loaf of bread is cut vertically, then the crosssection is almost a square. But if it is cut or sliced horizontally, the cross-section is a rectangle. - Similarly, other solid shapes can be sliced in order to find their 2D cross-sectional shapes.
Example: A cucumber cut vertically gives a circle.
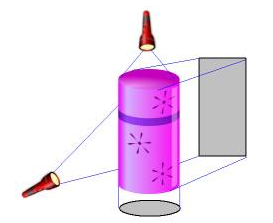
Viewing sections of a solid by using shadows
- Shadows can be used to view 3D objects as 2D shapes.
- Example: The shadows of a cylinder are shown below.
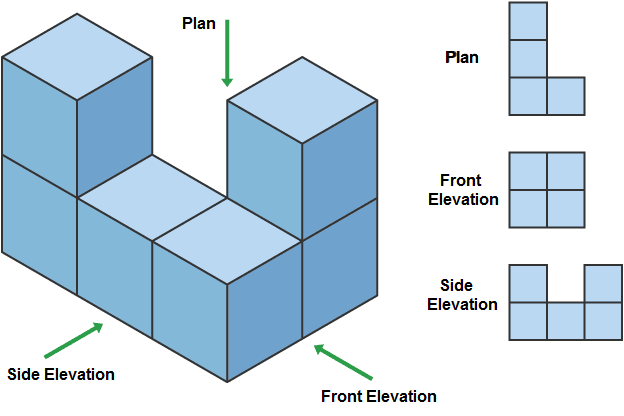
Different views of a Solid
- A solid can be visualised by looking at it from different angles, namely: (i) Front view (ii) Top view (iii) Side view.
- Example: The different views of a figure are shown below.
Quantities Associated with a Solid
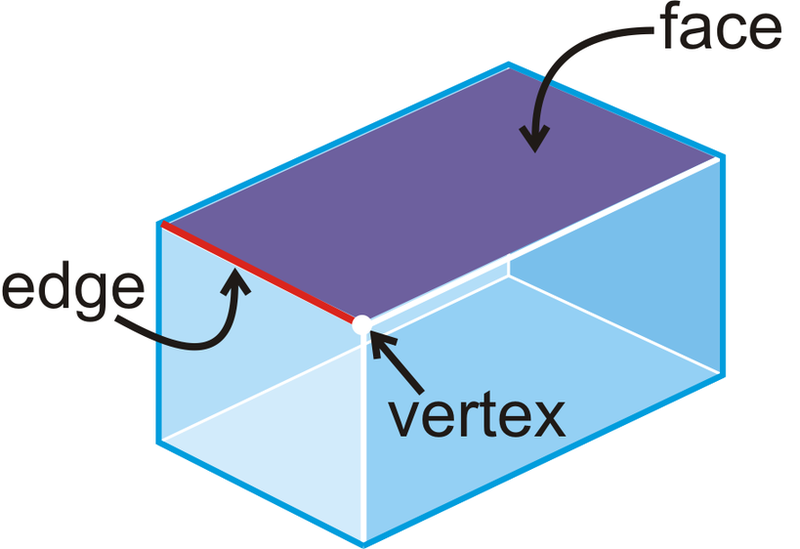
Faces, edges and vertices
- The corners of a solid shape are called its vertices.
- The line segment joining two vertices is called an edge, or when two planes of a solid meet it forms an edge.
- The surfaces of a solid shape are called as its face.
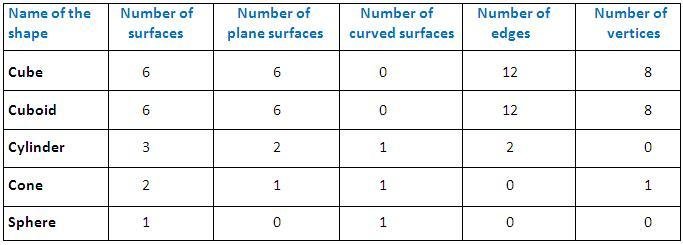
The table below shows the number of faces, edges and vertices some solid shapes have.
Nets of Solid Shapes
Building 3-D objects
A net is a flattened out skeletal outline or a blueprint of a solid which can be folded along the edges to create solid.The same solid can have multiple nets.
Example: A net for a cube box.

Representing 3D Shapes on a Paper
Drawing solids on a flat surface
- Solid shapes can be represented on a 2D flat surface like paper.
- This is done by drawing oblique sketches, to make it appear 3D. This is called as 2D representation of a 3D solid.
Obliques sketches
- Oblique sketches do not have the exact length of a solid shape but appears exactly like the solid shape.
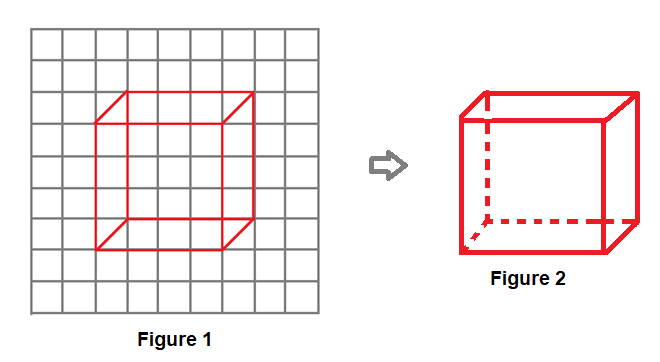
- Example: Drawing an oblique sketch of a cube:
Step 1: Draw the front and the opposite faces.
Step 2: Join the corresponding corners. (Figure 1)
Step 3: Redraw using dotted lines for hidden edges. (Figure 2)
This gives the oblique sketch of the cube.
Isometric sketches
- Isometric sketches have measurements equal to that of the solid.
- They are usually drawn on an isometric dotted paper.
- Example: Drawing an isometric sketch of a cuboid of dimensions 4 × 3 × 3:
Step 1: Draw a rectangle to show the front face of the cuboid.

Step 2: Draw four parallel line segments of length three starting from the four corners of the rectangle.
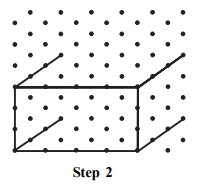
Step 3: Connect the corresponding corners using appropriate line segments.
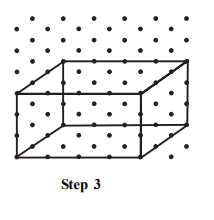
Step 4: The figure thus obtained is the isometric sketch of the cuboid.